0

Network Access Protection : Secure your Network

nap

Network Access Protection (NAP) is a platform that network administrators can use to help protect the security of a network. When you connect to a corporate network that uses NAP, your computer is checked to make sure that it has the required software and settings, and that the software and settings are up to date. If anything is missing or outdated, your computer can be automatically updated. Your network access might be limited during that time, but usually this process happens quickly, after which full network access is restored. So it checks if the computer you are connecting over network is really safe to connect or not.If any violation to NAP protocols is there such as presence of Virus,Trojans etc over the network computer you are connecting NAP wont allow you to connect.Enabling NAP enhance your security over network and you will be much more safe.

You can see if it is Activated here :  Control Panel >System Security>Action Center>NAP Status On/Off


0

Win Windows 7 Release Candidate DVD

win-7RCflash-subscription_17

Here is a chance for all to grab Windows 7 RC DVD.All you have to do is simply register yourself for TechNet Flash,a fortnightly newsletter on the latest updates in IT world.TechNet contains latest in product info,downloads,contests,promotions & all. The first 100 registrants will win Windows 7 RC DVD.Off course you could have it downloaded as well but what's better then getting an OS DVD for free.

Register for TechNet Flash Newsletter


0

Prevent Windows 7 from Automatically Rebooting after Installing Windows Updates

1

Windows updates force the OS to shut down after they install.This can be troublesome many a times when you dont want to restart your PC because of some work which is ongoing.So here is how to get rid of Reboot of Windows after Windows update Installation.To prevent Rebooting a registry tweak must be done.Here are the steps:

1. Click start Orb
2.Go to Run & type regedit.

3. In regedit, navigate to :
HKEY_LOCAL_MACHINE\SOFTWARE\Polices\Microsoft\Windows
4. In the left pane, right click on Windows, and click on New Key, then type WindowsUpdate

s2s3

5. In the left pane, right click on WindowsUpdate, and click on New Key, then type AU
6. In the right pane of AU, right click anywhere and select New DWORD 32-bit Value, then type in NoAutoRebootWithLoggedOnUsers.
7. Right click NoAutoRebootWithLoggedOnUsers & click Modify, then type its value as 1 and press enter.

s4

8. Close regedit.
9. Restart the computer.


Now Windows wont restart once you install updates.


0

Windows Application Compatibility Mode

Windows Vista onwards Compatibility mode is provided in applications.  Compatibility mode allows a older application compatible for an earlier versions of Windows to possibly run in Windows 7.It runs the program using settings from a previous version of Windows.Changing the compatibility mode solves the problem most of the time which is generally crashing of an application while executing it on a newer Windows.Even If changing the Compatibility settings does not fix the problem,you need to check for an update for that application at the manufacturer's website.
1.Right click on the program's shortcut, Application file, or installation program.
2.Click on Properties.It will show properties of that application with few tabs.cm1
3.Click on the Compatibility tab.
4. To Run a Program in Compatibility Mode you can select compatibility mode for a previous version of Windows.Choose the one this program works well on or the one you believe this program runs well on.
5.Check the Run this program in compatibility mode Check box.
6.Now Click on the drop down menu and select which version of Windows the program was made for.

cm3
7.Few more settings can be Changed to make the application more compatible.Checking the checkbox enables that particular setting.These settings are:
Run in 256 colors
Run in 640 × 480 screen resolution
Disable visual themes 
Disable desktop composition 
Disable display scaling on high DPI settings
8. Click OK to apply the changes.

 cm2 

It is recommended that Compatibility mode must not be used with system applications like system drivers or antivirus as that may cause losses & risks to your data.


0

Windows 7: Jump lists Customization

Windows 7 comes with a very handy feature called Jumplist. This feature shows a list of related tasks & Recent documents of a process or shortcut icon which is in taskbar. You can view & customize it easily.
1. Right click on any icon in the taskbar.
2. It will show a list of related tasks to that application as well, Number of recent applications.

jl
3. If there is a shortcut you wish to see every time you open the Jump list of that application you can pin that as well to Jump list.
Say for Windows Media Player you have recent shortcut of a movie and you wish it to appear permanently then you can pin it to the jump list.

sb1

4. You can also customize number of Recent Items in Jump list.
    a. right click on Start Button or taskbar (Super bar) of Windows 7
    b.Click on properties. It will pop up Taskbar & start Menu properties.
    c.Select the tab 'startMenu'.This will bring you Customize & Privacy options.
    d.Select Customize button there.
    e.Select Number of items in Jumplist from 10 to number you wish to.

sb3

5. Also you can choose default settings if you wish to undo all the changes you have done.


0

Windows 7: Start Menu Customization

Start Menu in Windows 7 can be customized according to user’s need. All the items in Start menu can either be set as display link or set as menu. Apart from it there are several more things to configure.
Steps are here:
1. Right click on Start Button or taskbar (Super bar) of Windows 7
2. Click on properties. It will pop up Taskbar & start Menu properties.

sb1
3. Select the tab 'Start Menu’. This will bring you Customize & Privacy options.
4. Select Customize button there.

sb2
5. You can select the behavior of items in Start Menu. If you want them to behave as link, Menu or Icon.
6. Behaviour of items like my computer, Downloads etc can be set.
7. Also you can choose default settings if you wish to undo all the changes you have done.
8.Click OK to apply the changes.


0

Windows 7 RC download Ends on 20 Aug 2009

Last Chance for all windows 7 lovers to have a taste of Windows 7 Release Candidate.You can download the RC version till Thursday, August 20th 2009.

Although After that date, you will still be able to register your product and get registration keys but,Win 7 RC will no longer be available for download.

If you have not downloaded the Release Candidate, You can download from here


0

Paint.NET v3.5 enhanced for Windows 7

The latest alpha build of Paint.NET v3.5 will now use DirectWrite instead of GDI for the Text tool if you are running Windows 7. DirectWrite is a new font and text rendering system that comes with Windows 7. In Paint.NET, you’ll see the following benefits:

  • Faster text rendering. This is currently due to important architectural differences from GDI. With DirectWrite, I can render using multiple threads (performance scaling), while also not blocking the UI thread from drawing (mutexing). GDI can only render text on 1 thread at a time, and that also includes the thread responsible for the UI. DirectWrite can also benefit from GPU acceleration when things are set up correctly with Direct2D (Paint.NET only uses the software rasterization capabilities right now, but in the future who knows!).
  • Better quality text rendering. DirectWrite implements what is called “y-direction antialiasing”. The short story is that GDI apparently only does antialiasing on the horizontal axis. It can also position characters with sub-pixel accuracy … in other words, GDI uses integers and DirectWrite uses floating point.
Windows 7 Users can Get it here:


0

Comparison of Virtual PC 2007 to Windows Virtual PC

In comparison to Virtual PC 2007,Windows Virtual PC has following additional features :
  • Integration with Windows XP Mode
  • USB support
  • Seamless application publishing & launching
  • Support for multi threads
  • Clipboard sharing
  • Printer redirection
  • Smart card redirection
  • Drive sharing
  • Integration with Windows Explorer
  • Known folder integration between host and guest
  • Support for higher resolutions
  • Requires AMD-V or Intel-VT CPU feature


0

System requirements for Windows Virtual PC


0

How to confirm your PC can run Windows XP Mode

There is an amazing feature with Windows .And that is XP mode.it is ot like the Virtual PC we used to do.It is much more different.Moving mouse between two OS is much more easy and it is much more easier for the user.Although OEMs have been shipping hardware virtualization in PCs for three years, hardware virtualization is not available in all PCs — so even if your PC is new, it may not have hardware virtualization. Additionally, those PCs with hardware virtualization have it turned off by default, so you will need to turn on the hardware virtualization capability before you can use it.

To determine whether your PC works with Windows XP Mode:

Step 1. Does my PC have a CPU with support for hardware virtualization?

For Intel processors:

  • Download, install and run the Intel Processor Identification Utility.

  • Navigate to the CPU Technologies tab and read the value in the "Intel Virtualization Technology" field.

    • If the value is No then your CPU does not support hardware virtualization.

    • If the value is Yes then the CPU supports hardware virtualization. Go on to step 2 below.

For AMD processors: AMD Virtualization Compatibility Check Utility.

Step 2. Does my PC BIOS support hardware virtualization, and is it turned on?

Instructions to turn on hardware virtualization in your PC BIOS are specific to OEM models. It is important that after changing your BIOS settings the PC is completely shut down at the power switch before restarting so that the new BIOS settings can take place.I did not Shutted it down and the settings dint took place.After a switch off completly for say 5 seconds or more your computer will enable VT.


0

Windows 7 RTM New User Account Pictures


You can find new User Account pictures in Windows 7 RTM.Here is the link to access them

and also given the screenshot which shows all of the New Pictures added.
You can copy these in Vista here : C:\ProgramData\Microsoft\User Account Pictures\Default Pictures to have them in your Windows Vista User Account


0

User Account pictures in Windows 7

[windows7.png]
You can find the default pictures of Windows 7 user Account in a hidden folder,path given below.Also you can find Admin & guest account picture here.
  • The default Pictures are located in the hidden C:\ProgramData\Microsoft\User Account Pictures\Default Pictures folder.
  • The default Standard and administrator account picture is the hidden C:\ProgramData\Microsoft\User Account Pictures\user.bmp file.
  • The default Guest account picture is the hidden C:\ProgramData\Microsoft\User Account Pictures\guest.bmp file.
If you wish to change these simply replace them with another file up to 128 x 128 pixels in size to prevent it from being automatically cropped to fit the user picture display box.


0

Windows 7 RTM Wallpaper for download

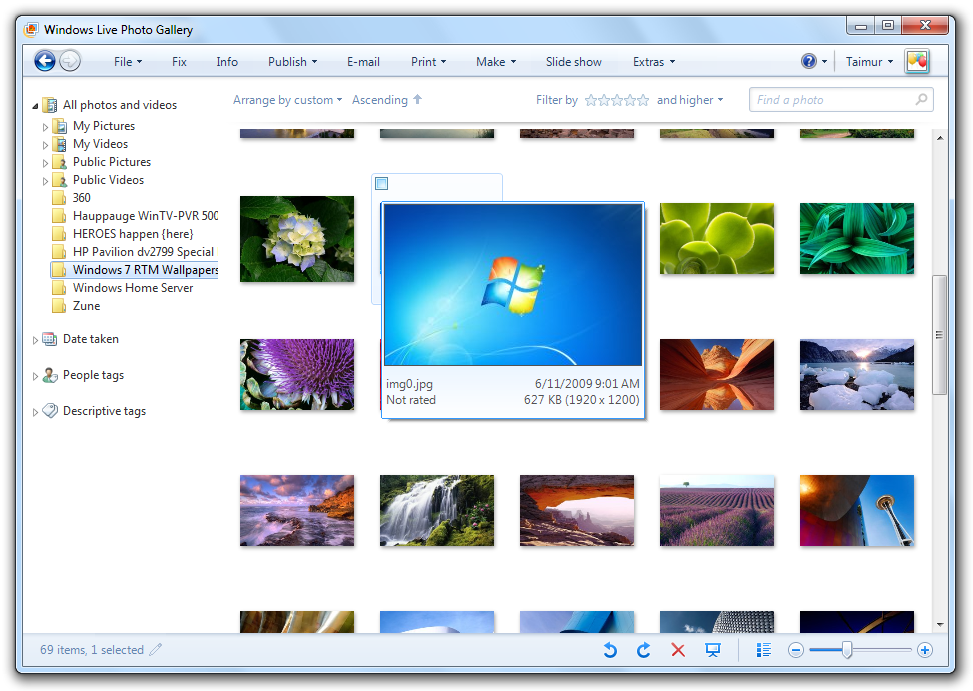
Wallpapers pack from Windows 7 RTM Build includes 69 beautiful wallpapers – all in high resolution.

Download Windows 7 Wallpapers Pack (RTM Build 7600.16385)

for a lot more Windows 7 Wallpapers check redmondpie


0

Windows 7 RTM bug isnt a showstopper

As we mentioned few days back Windows 7 RTM has a checkdisk bug . In reply to that Steven Sinfosky, president of the Windows division at Microsoft, says that this is indeed not a showstopper and occurs by design.

In this case, we haven’t reproduced the crash and we’re not seeing any crashes with chkdsk on teh stack reported in any measurable number that we could find. We had one beta report on the memory usage, but that was resolved by design since we actually did design it to use more memory. But the design was to use more memory on purpose to speed things up, but never unbounded — we requset the available memory and operate within that leaving at least 50M of physical memory. Our assumption was that using /r means your disk is such that you would prefer to get the repair done and over with rather than keep working.

While we appreciate the drama of “critical bug” and then the pickup of “showstopper” that I’ve seen, we might take a step back and realize that this might not have that defcon level. Bugs that are so severe as to require immediate patches and attention would have to have no workarounds and would generally be such that a large set of people would run across them in the normal course of using their PC.

Sinofsky also stated that they are doing overnight stress testing of 40 machines to see if the problem can be reproduced.


0

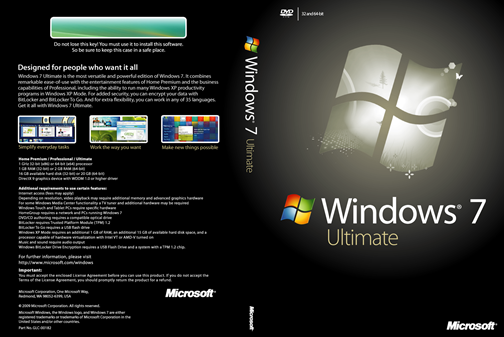
Windows 7 Ultimate Box Cover

This is the actual image from the original box Art with 150 dpi (1613×1080 resolution) which will feature on retail packages of Windows 7 Ultimate SKU.

Windows 7 DVD Cover

Windows 7 is releasing for general on October 22nd, 2009.

Download Windows 7 Ultimate DVD Cover

Source: Windows 7 Ultimate Box Art DVD Cover


0

Windows 7 Box Art Themes & Wallpapers

Windows 7 Box Art Themes for Ultimate, Professional and Home Premium editions

Windows 7 Box Art Themes

Windows 7 Box Art Wallpapers for Ultimate, Professional and Home Premium editions

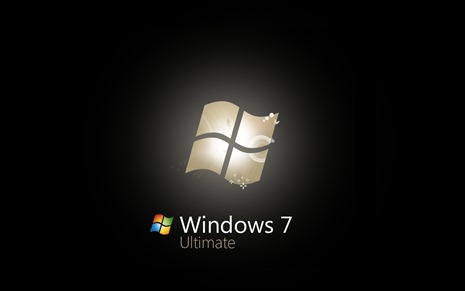
Windows 7 Ultimate wallpaper

Windows 7 Professional wallpaper

Windows 7 Home Premium wallpaper

Installation Instructions: Double click the downloaded .themepack file to install it. These themes will only work on Windows 7.

For more, visit the entire Windows 7 Wallpapers & Windows 7 Themes Gallery.

Source: Windows 7 Box Art Themes & Wallpapers

Download Windows 7 Box Art Themes
Download Windows 7 Box Art Wallpapers


0

Pop Up message when Windows Boots


When a user gets logon You might want to have a message pop up to display a Welcome message. This can be used to display Instructions,Company Policy,User related information,any alert,warning or anything you wish to do .

Here is the procedure .Open registry by typing regedit in the Run box.Now navigate here.

Navigate to:
HLM\SOFTWARE\Microsoft\WindowsNT\CurrentVersion\WinLogon

Create a new String Value here called LegalNoticeCaption. Enter whatever messag you want to see in the Title bar of the message that you wish to pop up. Now create another new String Value called LegalNoticeText. Modify it to the message you want to display each time Windows boots.The message will be displayed at the next logon.

This trick works with Windows 7 as well.


0

Download XP Mode RC for Windows 7 and Virtual PC RC

http://www.blogsdna.com/wp-content/uploads/2008/09/windows-vienna-7-logo.png

The release candidate flavor of Windows 7’s XP Mode was released by Microsoft on 5th August 2009.along with the beta variant of Windows Virtual PC.It works with both Windows 7 RTM,RC.
The RC iteration includes a copy of Windows XPService Pack 3, 450 MB in size, along with a Windows Virtual PC file of 5 MB. The XP Mode enables Windows 7 users to run Windows XP applications on Windows 7, and has been designed mainly for small/mid-size business users.
This will keep the users at comfort who wish to use two OS and are fed up of using shutdown-restart-shutdown cycle for migrating the work from 1 version of OS to other (7 to XP in this case)
It ease the migration process to Windows 7 by providing additional compatibility for their older productivity applications. Users can run and launch Windows XP applications in Windows XP Mode directly from a Windows 7 desktop.

New Features in RC version:

  • You can now attach USB devices to Windows XP Mode applications directly from the Windows 7 task-bar. This means your USB devices, such as printers and flash drives, are available to applications running in Windows XP Mode, without the need to go into full screen mode.
  • You can now access Windows XP Mode applications with a “jump-list”. Right click on the Windows XP Mode applications from the Windows 7 task bar to select and open most recently used files.
  • You now have the flexibility of customizing where Windows XP Mode differencing disk files are stored.
  • You can now disable drive sharing between Windows XP Mode and Windows 7 if you do not need that feature.
  • The initial setup now includes a new user tutorial about how to use Windows XP Mode.

You can download Windows XP Mode RC and Windows Virtual PC RC using following link:

Download Windows Virtual PC and Windows XP Mode

NOTE: Windows XP Mode RC requires RC or RTM version of Windows 7 Professional, Ultimate or Enterprise. It also requires additional 1 GB of RAM, 15 GB of available disk space, and processor capable of hardware virtualization with AMD-V or Intel VT turned on in the BIOS.

Some part of the post contains contan extract from the post by AskVG


0

Windows 7 RTM contains a chkdsk bug

Windows 7 RTM, which will be distributed to MSDN/TechNet and technical beta testers tomorrow, contains a nasty memory leak when the chkdsk command is initiated.

The bug occurs when the CHKDSK /R command is initiated on a non-system volume. Memory usage of the chkdsk.exe process soars until the system is using over 90% physical memory. In some cases this will cause the system to become unresponsive and unstable.
http://www.neowin.net/images/uploaded/chkdsk.jpg

Page Navigation

IndiBlogger Rank

Hit Stats

About Me

My photo
Technology Lover & an IT Professional.

Twitter

http://www.twitterbuttons.com

MeraWindows

Delhi IT Pro

Delhi Devs

IndiBlogger

IE8

IP Address

Friends

AskVG.com
winspark unlockWindows.com techsurface.com

Copyright © 2009-2010 CyberDimensions | Theme Designed by TheBuckmaker | Re-Designed by: Vasu Jain | Home Page Image : Microsoft Windows 7 . | Theme Distributed by Mumbai Mania